
[NSX ALB] SELF-REGISTERING KUBERNETES SERVICES USING AKO (ENTERPRISE LICENSE)
[NSX ALB] SELF-REGISTERING KUBERNETES SERVICES USING AKO (ENTERPRISE LICENSE)
Hello everyone!
I am back with my batteries recharged after a short and well-deserved summer break.
One of the great advantages of using AKO (AVI Kubernetes Operator) as the ingress controller in our environment is that it gives the balancer full layer 7 visibility into what we have deployed within Kubernetes, including the hostname we have given to our microservices.
In this post, I would like to show you how to use AVI as a DNS provider in order to self-register both layer 4 services (LoadBalancer) and layer 7 services (Ingress) that we expose from our Kubernetes cluster, additionally we will go one step further and create a delegation in our main DNS for those services that we want to expose to end users.
Prerequisites:
- A Kubernetes environment (Standalone, Tanzu, Openshift…)
- NSX Advanced Load Balancer (AVI) with enterprise license
- Routing between AVI and the corporative DNS server
- AVI Kubernetes Operator (AKO) installed in our k8s cluster
Step 1: Creating an internal DNS service on the balancer:
The first step is to create an internal DNS service on the NSX ALB, this service will respond to DNS requests made to its VIP.
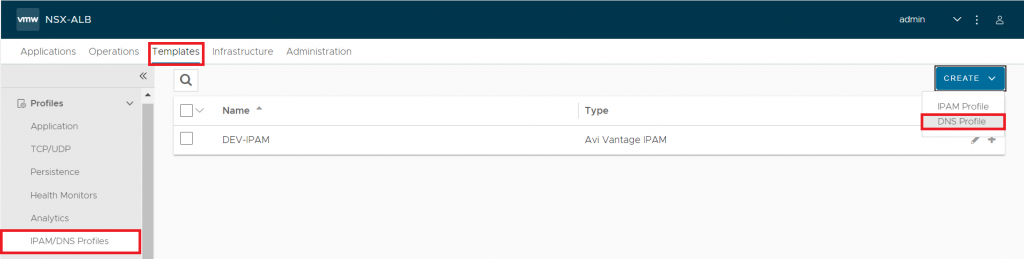
1.1 Creating an IPAM profile
First of all, we will go to Templates – IPAM/DNS Profiles and we will choose DNS Profile
This profile will contain all the domains where AVI will respond to DNS requests, in our case we will register two:
- sd-juan.es – Accessible by all clients pointing to the internal DNS.
- prod.sd-juan.es – We will delegate this domain to the corporate external DNS so that end users can reach it.
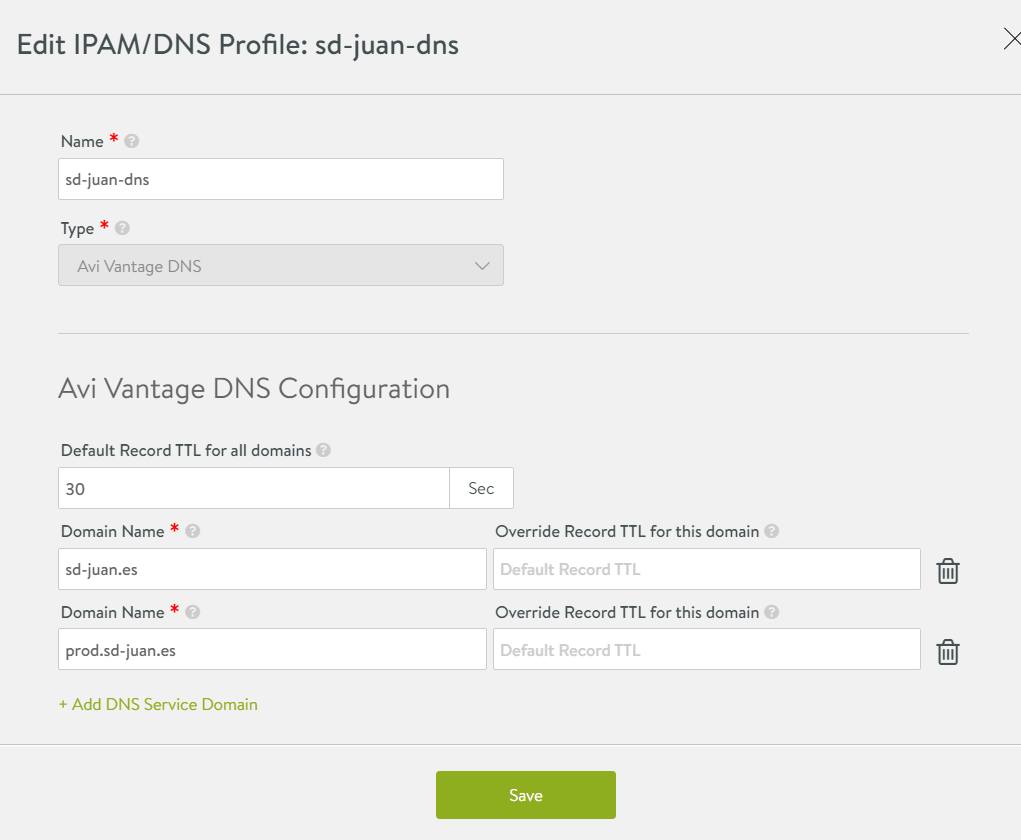
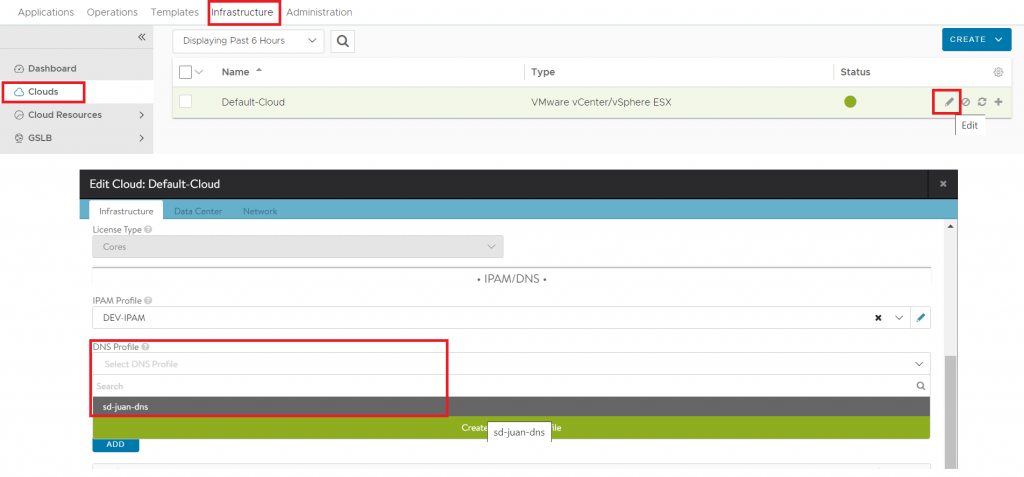
Once done, we will click on “Save”, go to Infrastructure – Clouds and edit the configuration of our cloud, adding the profile we have just created:
1.2 Creating a Virtual DNS Service
The next step is to create a virtual DNS service by going to Applications – Virtual Services – Create Virtual Service – Advanced Setup.

On the wizard we will choose:
- VS VIP: The VIP we want to designate for the DNS service, we can choose to auto-assign it from one of our VIP pools or create it statically.
- Application Profile: Choose System-DNS (This will automatically change the TCP/UDP Profile).
- Pool: We have the option of creating a pool with our external DNS servers to be used as DNS-Relay (AVI will forward to these DNS with all the domains it doesn’t know natively).
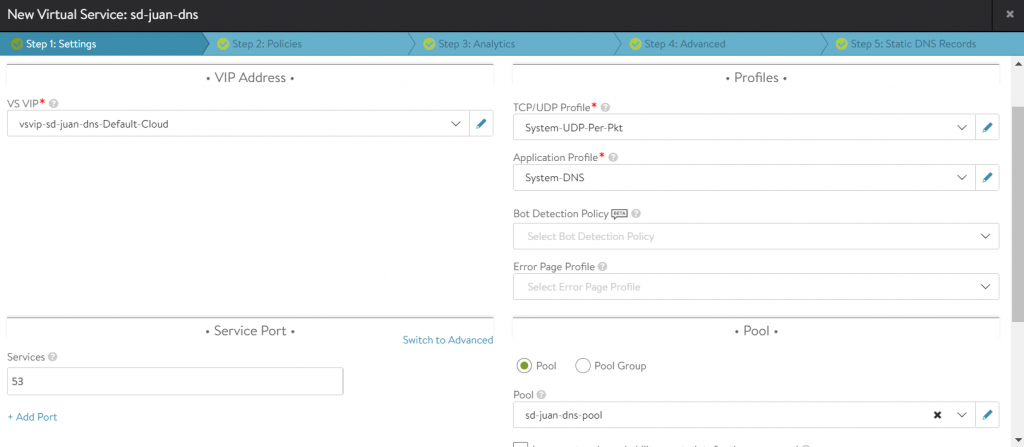
Then proceed to click “Next” to the end (we can customise many more options in the wizard, but it is beyond the scope of this tutorial).
Our DNS service will be ready

1.3 Enabling AVI as DNS Provider
The last step of this section will be to configure AVI as DNS Provider, making reference to the newly created service. To do this we will go to Administration – DNS Service – DNS Virtual Services and choose our service:
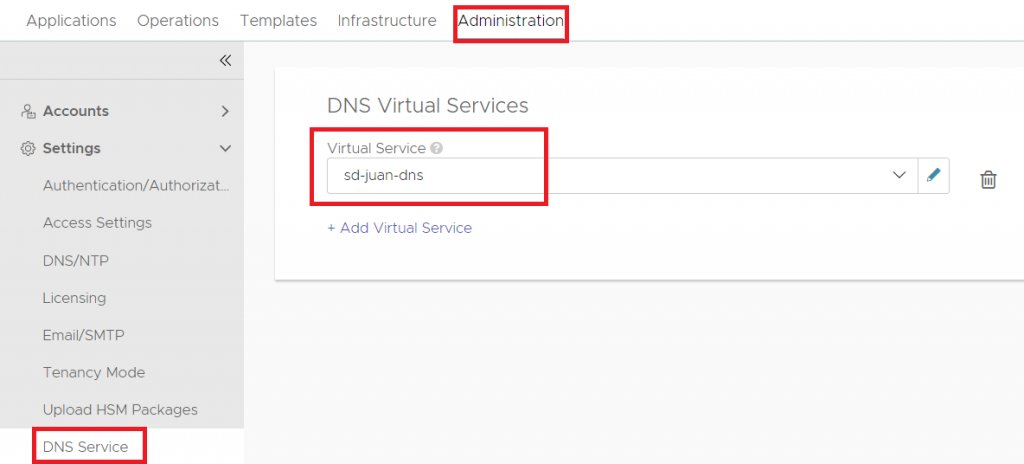
Once these steps have been completed, our balancer is ready to provide DNS services.
Step 2: Exposing services from kubernetes and testing the internal DNS
In this step, we will expose an ingress (layer 7) from kubernetes and verify that it self-registers on the internal DNS, for this test I have deployed a nginx pod called nginx-dev and exposed its corresponding service, so we will proceed to create an ingress pointing to nginx-dev.sd-juan.es as shown below:
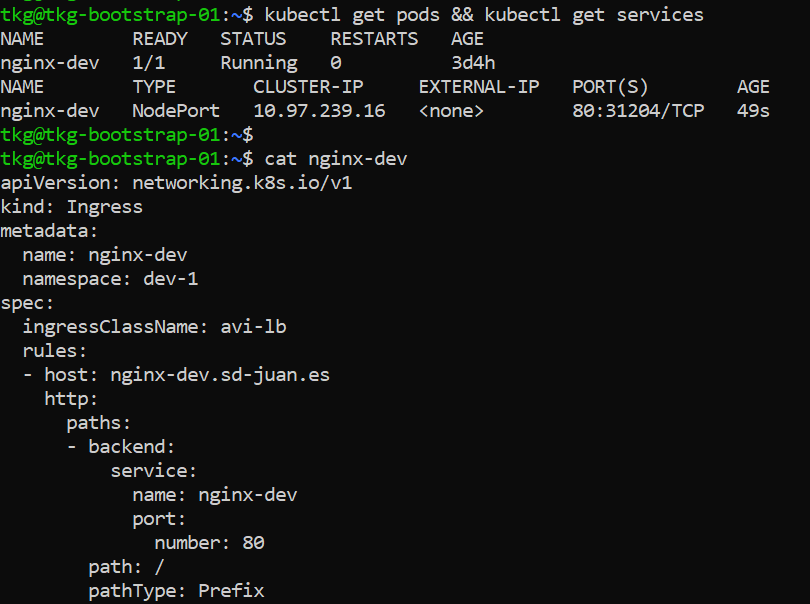
We will apply the yaml and verify the correct creation of the ingress:

In the ALB we will be able to verify that the corresponding VS has been created and that it correctly receives the “APP Domain Name”

Finally, we will try to run an nslookup from our machine using as DNS server the VIP of the DNS service configured in AVI:
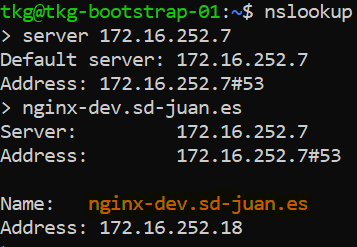
The resolution is correct, so in those machines where we configure this VIP as DNS server, we will be able to resolve automatically all those services and ingress that we expose from kubernetes.
Step 3: Creating a delegation in the corporative DNS to expose productive services
In the previous steps, we configured AVI as Internal DNS and verified how the exposed services were automatically registered in it.
But what if we want to expose services without having to modify the DNS configuration of all the end-user devices, and what if we don’t want them to be able to resolve addresses corresponding to development or pre-production environments?
In this case, we will delegate the *.prod.sd-juan.es domain to AVI in our main DNS.
3.1 Creating the delegation on the main DNS
In my case, the DNS I use as “Corporate DNS” is based on Windows Server, so the steps to follow are as follows:
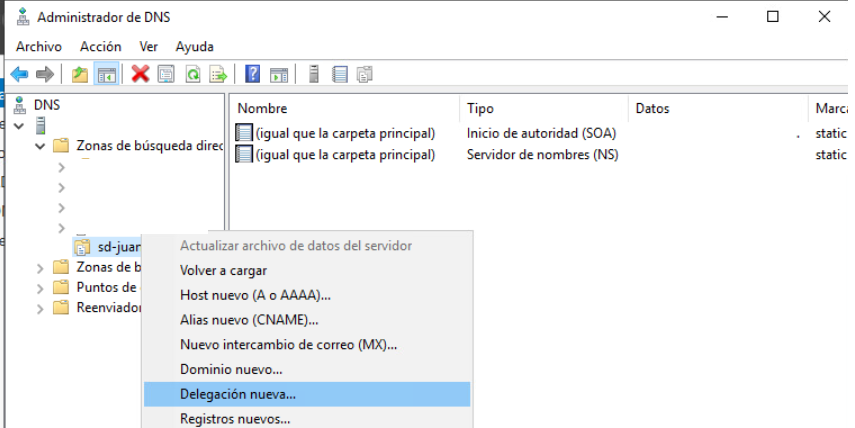
- In the server’s administration console open DNS

- In “Direct search zones” we choose our zone, right click and choose “New delegation“.
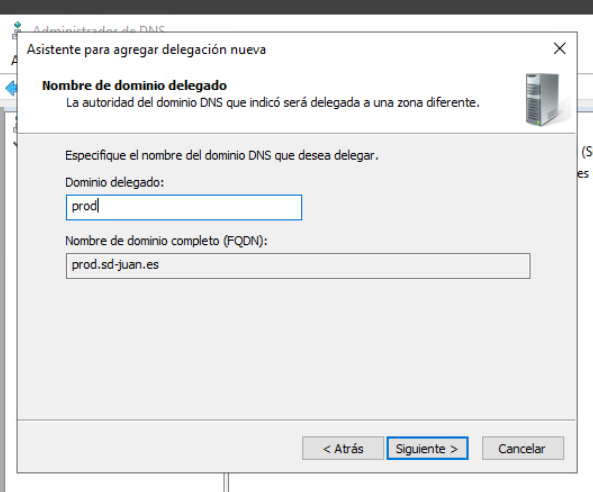
- The wizard will open and we will enter the name of the domain to delegate.
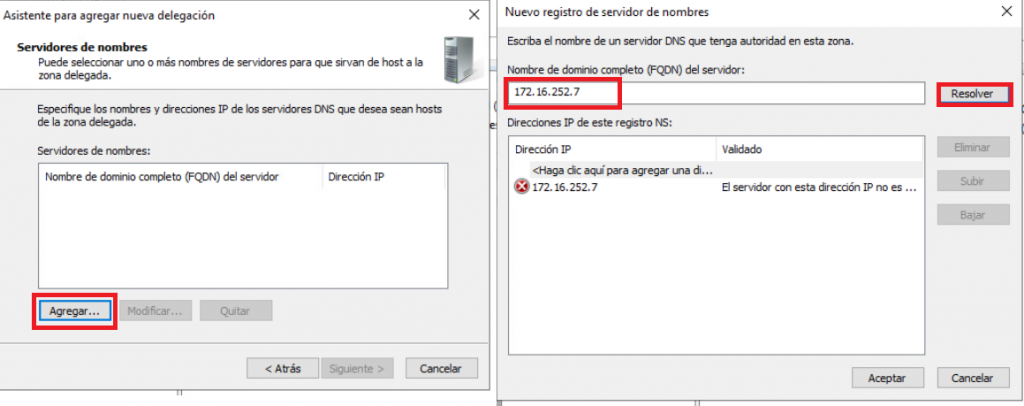
- We will click next, and then “Add…”, in the window that opens we will enter the VIP of the DNS service created in step 1 and click “Resolve”, Lets ignore the validation error and click “Accept”.
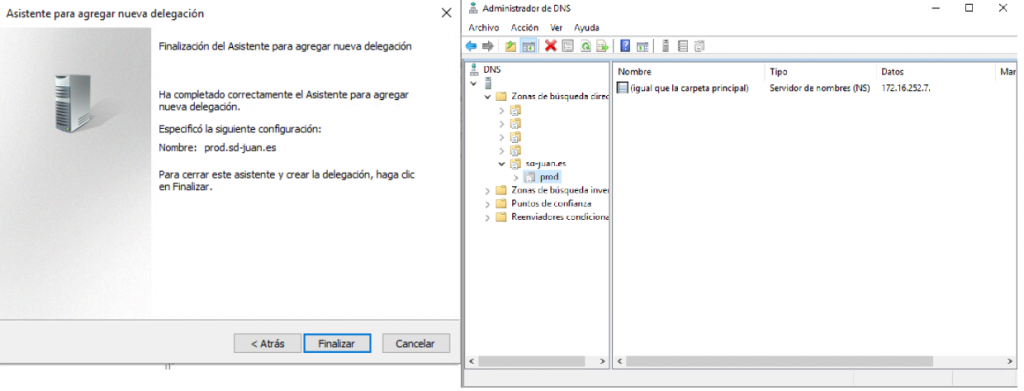
- Finally, click on finish and our delegation will be ready.
3.2 Exposing services and resolving them trough the main DNS
For the next test, we will keep the ingress created in step 2 “nginx-dev.sd-juan.es” and create a new nginx pod, called nginx-prod.
We will expose this pod and create an ingress pointing to nginx-prod.prod.sd-juan.es
We will then try to resolve both hosts from the Corporate DNS.

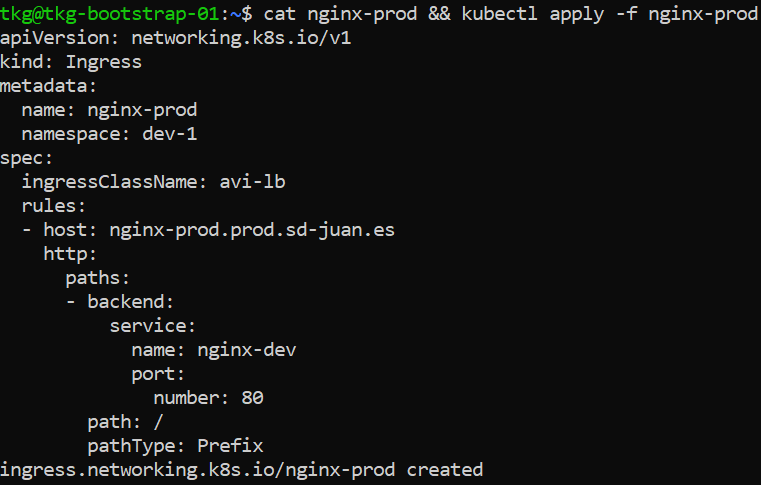

Once the new ingress is created, we open a CMD from a user’s computer.
First we will try to reach nginx-dev.sd-juan.es with no success.

However, if we try to get to the production nginx…
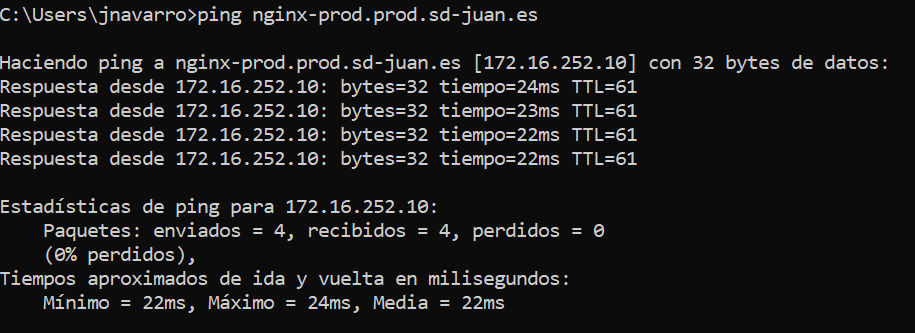
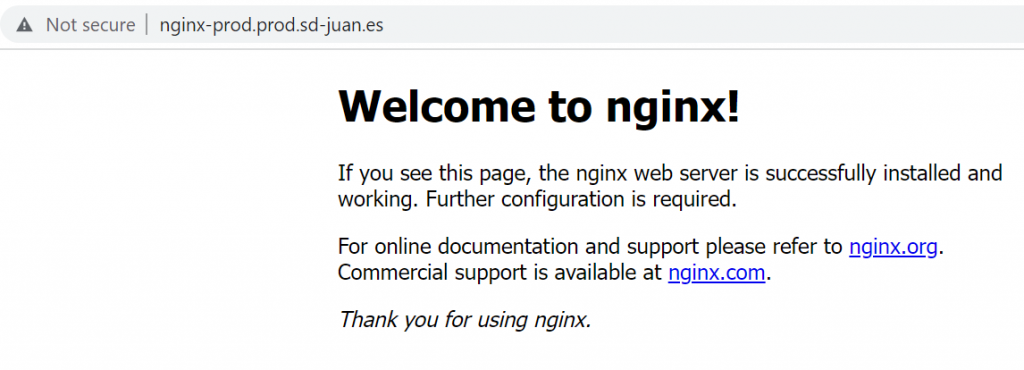
Eureka! Our production service will be reachable via the corporate DNS, while our development service will only be reachable from the Internal DNS.
As always, thank you very much for reading me and I hope you find this content useful! Please, feel free to leave a comment or contact me with any questions or suggestions.