
[NSX] Advanced Security Series 1: Deploying NSX Application Platform
[NSX] Advanced Security Series 1: Deploying NSX Application Platform
NSX-T (from now on NSX) is, in my opinion, the best network virtualization platform available on the market.
In addition to offering a flexible, modern and easily scalable SDN environment within the Data Center, NSX offers several security features from a network point of view that make it a great ally when it comes to protecting our VMs.
These features are:
- Distributed Firewall, at the vmnic level within each of our VMs, giving it enormous granularity in both N-S and E-O (micro-segmentation).
- Gateway Firewall, a firewall that runs at the gateway level, making it a perfect substitute for the traditional perimeter firewall.
- Identity Firewall, firewall synchronised with our active directory or LDAP, allowing us to establish sets of rules at AD group level. It is very useful in VDI environments.
- Distributed IDS/IPS, IDS/IPS capable of detecting and preventing both North-South and East-West, without the need for complex configurations or topologies, or configuring port-mirroring for its operation.
- Malware Prevention, capable of performing a deep analysis of files in each of our Windows VMs, preventing the download of malware by blocking it at network level.
- NSX Intelligence, a distributed analysis engine capable of detecting all traffic flows within our DC and offering personalised security recommendations for each of them.
- NSX Network Detection and Response (NDR),analysis panel for correlating and visualising threats to our environment.
The last 3 (Malware Prevention, NSX Intelligence, NSX NDR) require NSX Application Platform deployment to function..
NSX Application Platform is a modern microservices platform running inside a Kubernetes cluster. In this guide we will learn how to deploy it.
Prerequisites
- NSX-T 3.2 or NSX 4.0
- Valid NSX ATP license
- A Kubernetes upstream cluster (TKG, vSphere with Tanzu, Standalone)…
- Internet connectivity from NSX Manager
- Connectivity between the K8s Ingress network and NSX Manager
- A DNS server
1. (Vsphere with Tanzu), creating our kubernetes cluster
Firstly, we will have to take the VMware requirements table, as a reference, to size a cluster that meets the requirements, depending on the NSXAP form factor we want to install:
1.1 Official VMware Cluster Sizing Table
| Form Factor | Minimum # of Nodes in a TKC or Upstream Kubernetes Cluster | vCPU | Memory | Storage | Ephemeral Storage | Supported NSX Features |
|---|---|---|---|---|---|---|
| Standard | 1 control node and 3 or more worker nodes (See more information later in this topic.) | – 2 vCPUs for the control node (See more information later in this topic about using guaranteed-small VM)– 4 vCPU per worker node | – 4 GB RAM for the control node (See more information later in this topic about using guaranteed-small VM)– 16 GB RAM per worker node | 200 GB per node (See more information later in this topic.) | 64 GB | NSX Network Detection and Response NSX Malware Prevention NSX Metrics |
| Advanced | 1 control node and 3 or more worker nodes (See more information later in this topic.) | – 2 vCPUs for the control node (See more information later in this topic about using guaranteed-small VM) – 16 vCPU per worker node | – 4 GB RAM for the control node (See more information later in this topic about using guaranteed-small VM)– 64 GB RAM per worker node | 1 TB per node (See more information later in this topic.) | 64 GB | NSX Intelligence NSX Network Detection and Response NSX Malware Prevention NSX Metrics |
| Evaluation (Non Production.) | 1 control node and 1 worker node | – 2 vCPUs for the control node (See more information later in this topic about using guaranteed-small VM)– 16 vCPU per worker node | – 4 GB RAM for the control node (See more information later in this topic about using guaranteed-small VM)– 64 GB RAM per worker node | 1 TB per node | 64 GB | NSX Intelligence NSX Network Detection and Response NSX Malware Prevention NSX Metrics |
1.2 Creating the required VM Class for the workers. (vSphere with Tanzu)
In my case, the form factor I want to deploy is evaluation because I will use the environment for testing, so I will deploy 1 control node and 1 worker adding an additional volume of 64Gb as indicated in the prerequisites.
According to VMware, the workers for this form factor must have 16vCPU and 64 GB of RAM, however by default in vSphere with Tanzu there is no VM Class with these characteristics, so we will create it.
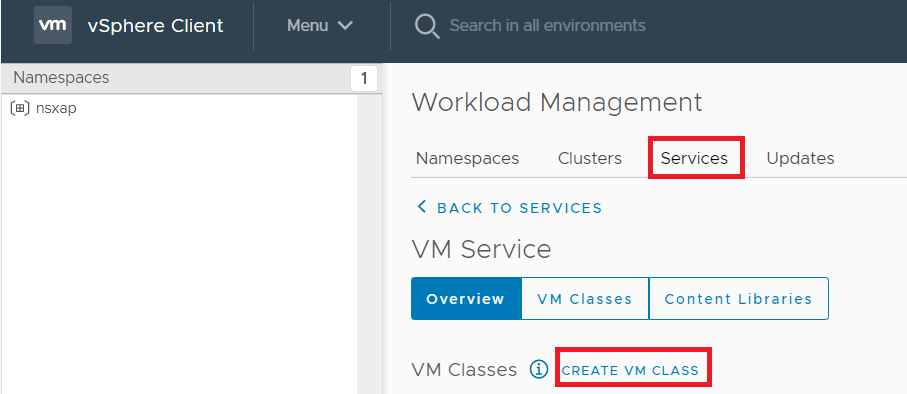
In our vCenter, we will go to “Workload Management” – “Services” and click on “Create VM Class”
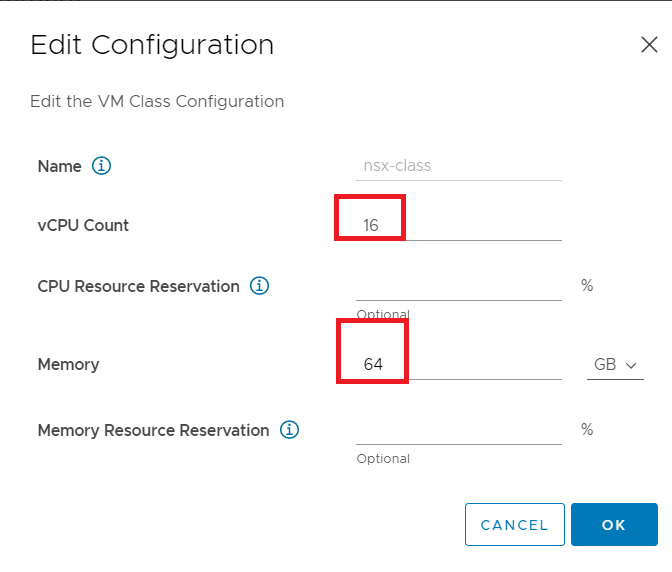
Next, we will enter:
- vCPU Count: 16
- Memory: 64 GB
The reserve parameters are optional depending on the availability of resources that we want to give to the environment.
Next, we will go to our namespace and add the VM class we just created.
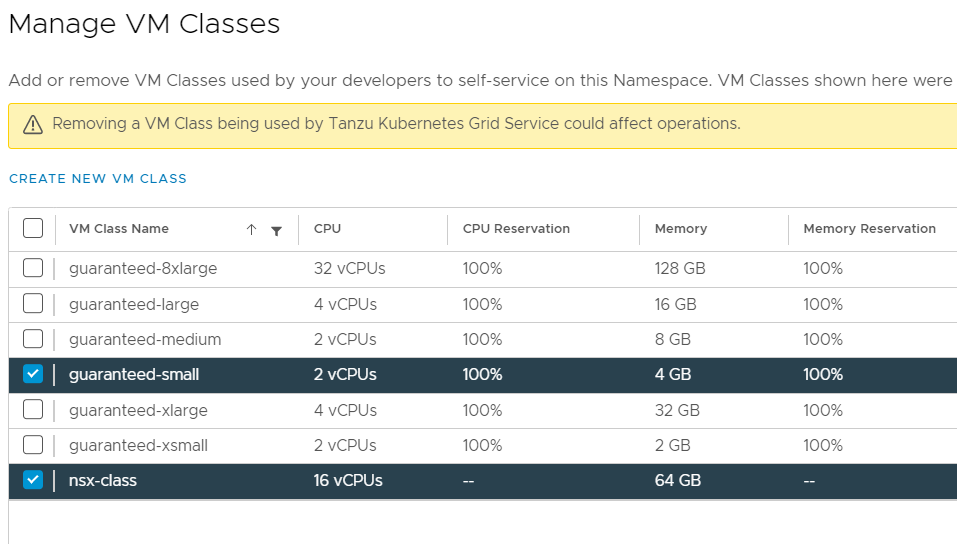
With this, we will have our vSphere with Tanzu environment ready to deploy a cluster with the requested features.
1.3 Deploying the cluster (vSphere with Tanzu)
The next step will be to prepare our YAML for the creation of the cluster, in my case it will be as follows:
apiVersion: run.tanzu.vmware.com/v1alpha1      #TKGS API endpoint
kind: TanzuKubernetesCluster                   #required parameter
metadata:
  name: nsxap                        #cluster name, user defined
  namespace: nsxap                   #vsphere namespace
spec:
  distribution:
    version: v1.20.7                             #Resolves to compatible TKR 1.20
  topology:
    controlPlane:
      count: 1                                 #number of control plane nodes
      class: guaranteed-small                #vmclass for control plane nodes
      storageClass: vsan-default-storage-policy          #storageclass for control plane
      volumes:
        - name: containerd
          mountPath: /var/lib/containerd
          capacity:
            storage: 64Gi
    workers:
      count: 1                                 #number of worker nodes
      class: nsx-class                #vmclass for worker nodes
      storageClass: vsan-default-storage-policy         #storageclass for worker nodes
      volumes:
        - name: containerd
          mountPath: /var/lib/containerd
          capacity:
            storage: 64Gi
Once we apply the yaml, the cluster will start creating, wait until it is ready:

2. Creating the required roles and getting the Kubeconfig
Once our cluster is ready, we will need to create the corresponding ServiceAccount and ClusterRoleBinding so that NSX can login and create objects in the cluster.
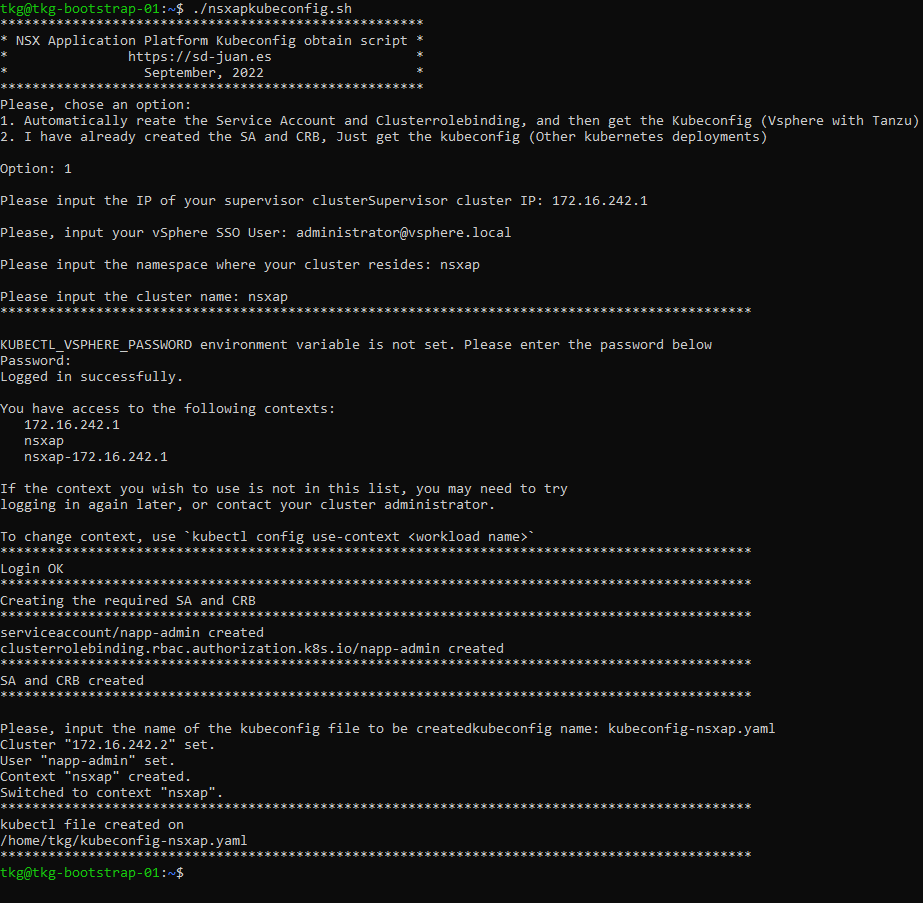
2.1 Option A: Script for automatically getting de Kubeconfig
To simplify this task, I have created a script that will automatically create these roles and get the kubeconfig (if we use vSphere with Tanzu) or get the kubeconfig (any other Kubernetes cluster) automatically once these roles are created.
You can download it here, or if you prefer not to download it, you can view and copy the content here:
2.2 Option B: Manually creating the roles
If you are not using vSphere with Tanzu, you will need to manually login into the cluster and create the roles using the following command:
kubectl create serviceaccount napp-admin -n kube-system # creates the napp-admin serviceaccount in the kube-system namespace
kubectl create clusterrolebinding napp-admin --serviceaccount=kube-system:napp-admin --clusterrole=cluster-admin # creates the required clusterrolebinding for the napp-admin user
If you do not want to automate the creation of the kubeconfig, you can follow the steps indicated by VMware to obtain it.
3. Registering messaging services and Interface in DNS
NSX Application Platform requires exposure to two services in order to work.
- Interface Service: It will be the HTTPS endpoint through which NSX Manager will connect to Application Platform
- Messaging Service: It will be used to receive data from the NSX collectors integrated in the application platform
These two services must be registered in DNS prior to deployment, as NSX will do a reverse lookup at the time of deployment, and if they are not found, the installation will fail.
Both services must register with an IP within our Kubernetes Ingress network.
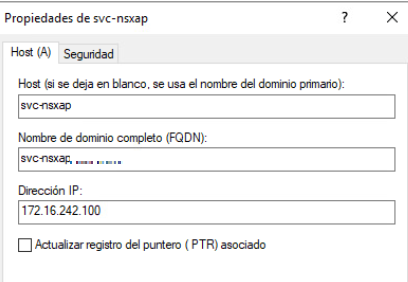
In my case, my DNS is Windows Server, and my Ingress network is 172.16.242.0/24, so I have chosen the following FQDNs and IPs for registering my services
- Interface Service:
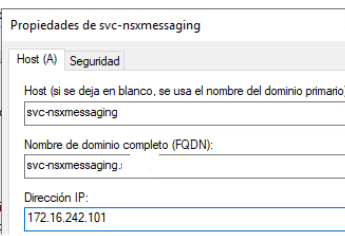
- Messaging service:
4. Deploying NSX Application Platform
4.1 Deploy parameters
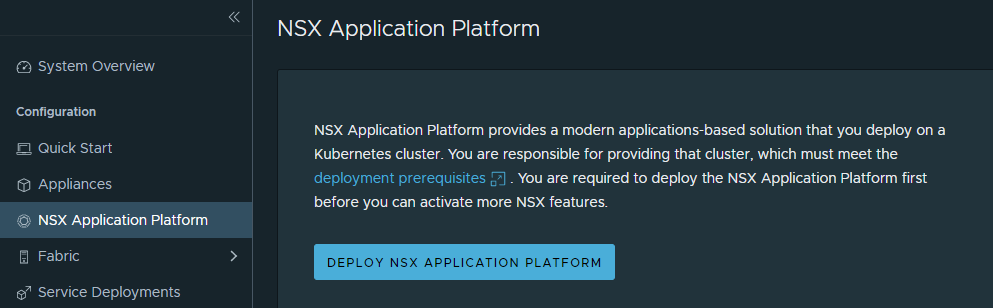
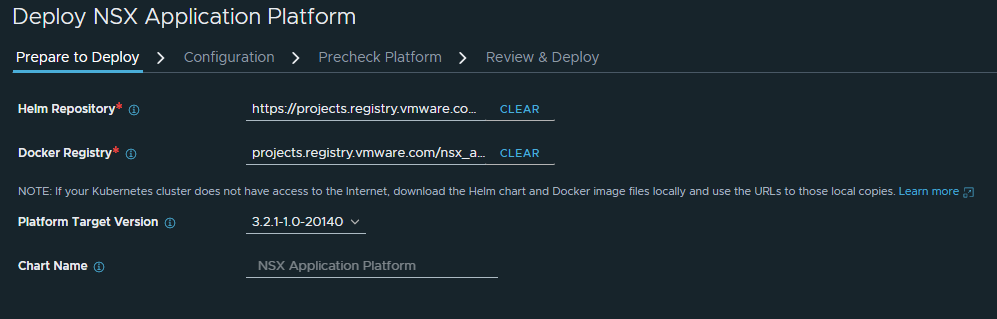
Once the kubeconfig is obtained, we can proceed to deploy NSX Application Platform. To do so, in our NSX Manager go to “System” – “NSX Application Platform” and click on “Deploy NSX Application Platform”
We will introduce the public VMware Helm repository and Docker registry:
Helm repository: https://projects.registry.vmware.com/chartrepo/nsx_application_platform
Docker registry: projects.registry.vmware.com/nsx_application_platform/clustering
Then, choose the version of NSXAP to deploy, and continue with
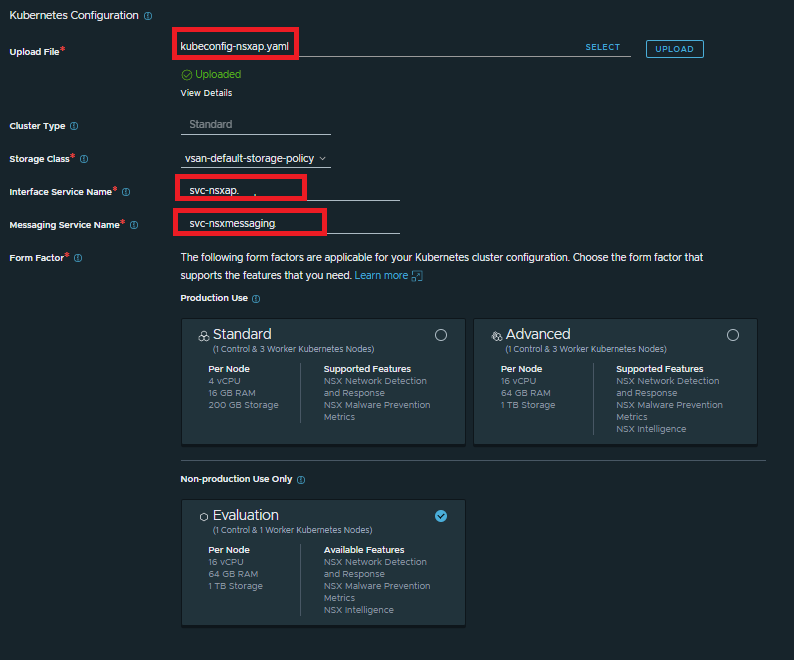
In the next screen, we will load the kubeconfig created in step 2, as well as enter the FQDN of the registered services in step 3, and choose the form factor of our NSX Application Platform.
This form factor must match the cluster created in step 1
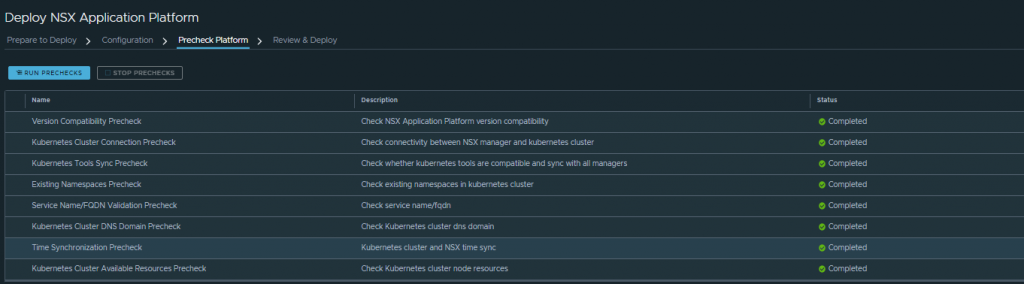
4.2 Preckecks and deploy
On the next screen we will run the prechecks, and if everything is correct, we can proceed to the deployment:
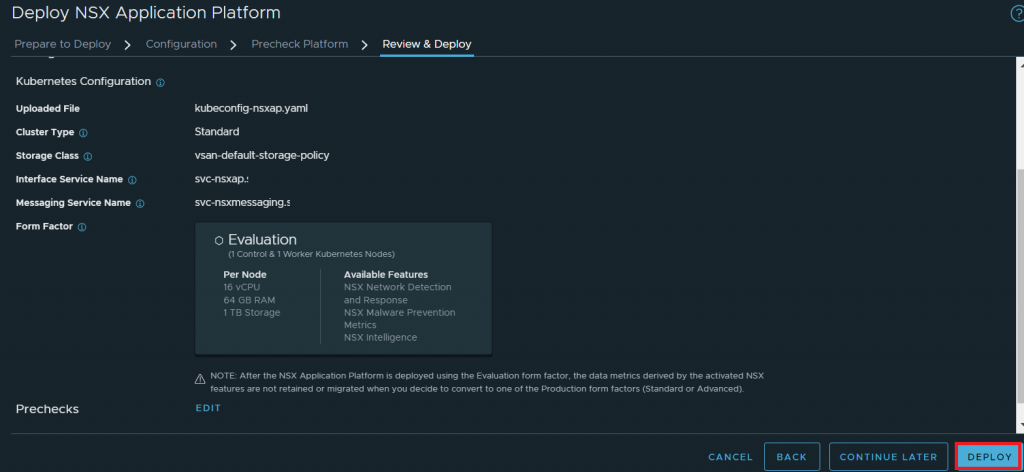
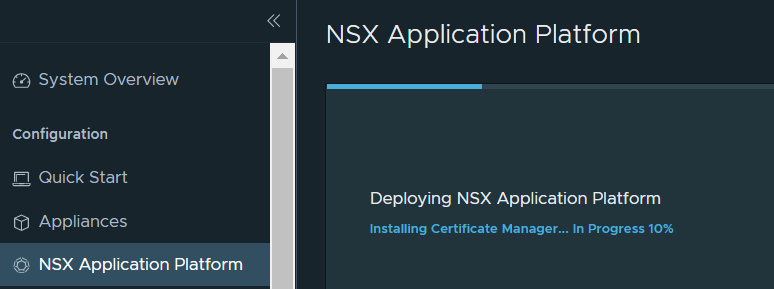
Click on “Deploy” and wait for NSX Application Platform to deploy.
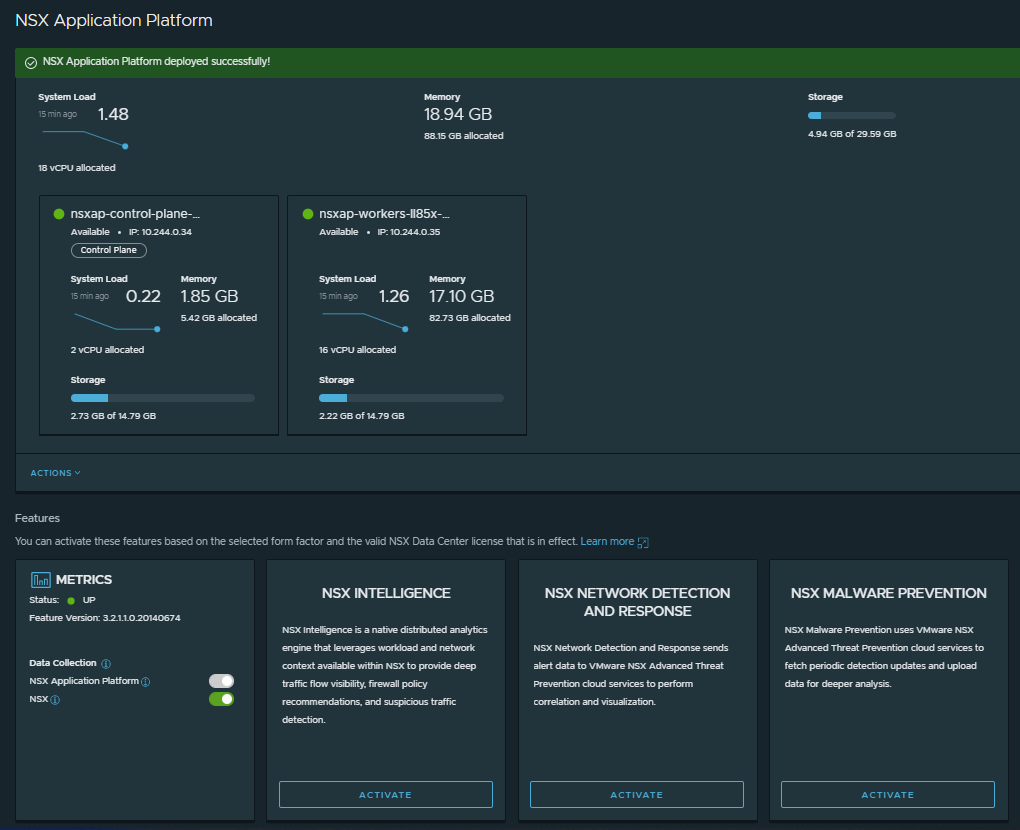
If everything went well, after a few minutes you should see the following screen, confirming that you can now use NSX Application Platform and activate advanced security features such as NSX Intelligence, NSX Malware Prevention or Network Detection and Response.
As always, I hope you found it useful and enjoyed it as much as I did, so don’t hesitate to comment on any suggestions or questions!